

OpenVAS Is Broken on ParrotOS 5.0 and No One Has Fixed It. Here’s What To Do.
Greenbone's OpenVAS is an incredible vulnerability assessment scanner, but users are having trouble starting it up on the latest release of ParrotOS.


ParrotOS, just like Kali Linux, comes with a vast selection of security tools pre-installed. Typically, you don't have to do any time-wasting installs yourself and can get right to work. Sadly, that's not always the case. Sometimes things break and we have to put in a little bit of elbow grease.
ParrotOS 5 Electro Ara breaks OpenVAS, which at the time of writing this, still hasn't been addressed by the development team. If you frequently use this vulnerability scanner in your pentesting assessments, I'm sure you're frustrated (as am I).
I know Nessus exists, but that costs money, and frankly I don't feel like paying. So how do we get OpenVAS to work?
First let's look at the issue. Every time I would install OpenVAS, I would be greeted with a message at the end saying my install was not complete. Checking the status gvm-check-setup said the same thing. I knew it was installed, but for some reason my computer wouldn't believe me.
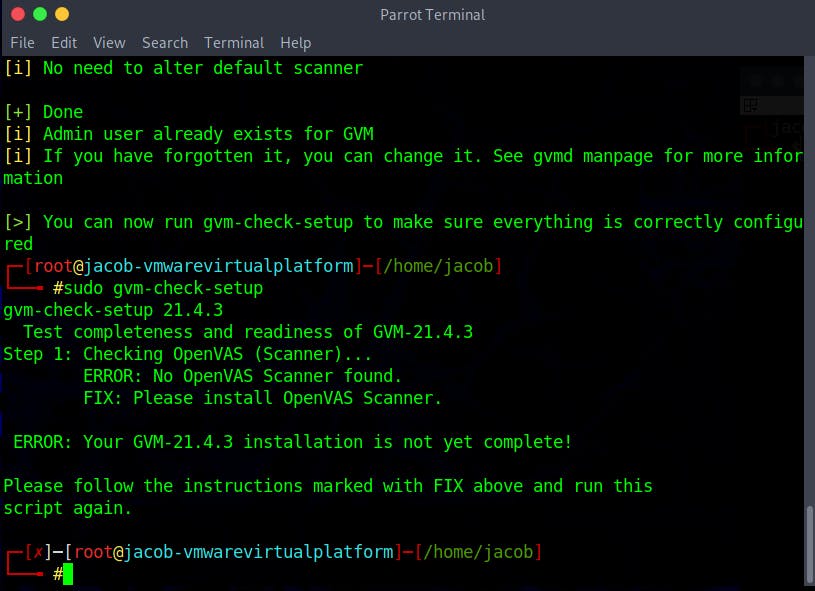
Everything was done right. The PostgreSQL database was created, the admin user and password were generated, and yet OpenVAS wasn't working. To be honest with you, I have no idea why it wasn't, and that's usually the point where I go looking for a Docker image to pull. If I can't get something to run via normal install, there's a good chance it'll run in a Docker container. As it turns out, a Docker deployment of OpenVAS works perfectly on Parrot OS 5.
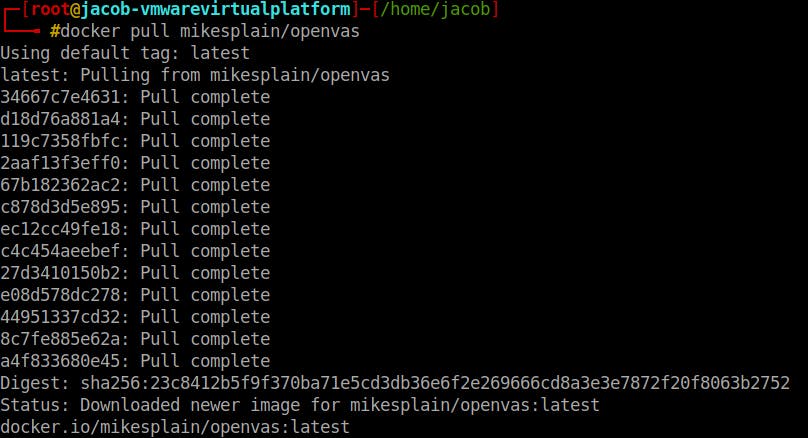
Step 1: Pull the Docker Image
To begin, please install Docker if it is not installed already. I will not be covering the steps to install Docker in this tutorial. Next, visit this link on the Docker Hub. We will be using an image by mikesplain. Open up your terminal and type in docker pull mikesplain/openvas. Keep in mind this image is of OpenVAS 9 and meant for Debian-based distros. Let it install.
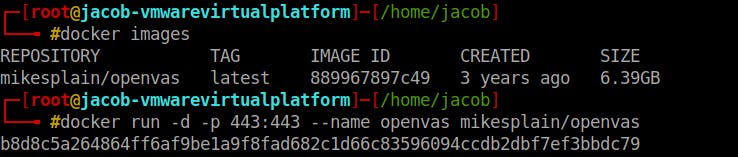
Step 2: Start OpenVAS
To start OpenVAS, run this command: docker run -d -p 443:443 --name openvas mikesplain/openvas. You may have noticed from the command you just entered that OpenVAS will be running on TCP/443. OpenVAS may take 4-5 minutes to start up. Be patient.
Step 3: Check Status of OpenVAS Service
To see if OpenVAS successfully started up, run docker top openvas. You can also run docker ps -a to show both running and stopped containers.

Step 4. Log In to OpenVAS
To log in to OpenVAS, open up your web browser and navigate to https://127.0.0.1:443. 127.0.0.1 is your loopback address and it represents your localhost.
The default credentials are admin:admin. Enter those to log in.
You can change your admin password by specifying a new one at runtime: docker run -d -p 443:443 -e OV_PASSWORD=securepassword41 --name openvas mikesplain/openvas.
After OV_PASSWORD=, write your custom password. Remember, if your container is already running, you will have to stop it and re-run it using the above command.
Step 5 (Optional): Update NVTs
Occasionally you may need to update your NVT database. The container is automatically updated about once a week, but if you want to manually go in and do it yourself, you need to run bash inside the container and run some commands.
First, run docker exec -it openvas bash to exec into the container.
Once inside the container, run these:
## inside container
greenbone-nvt-sync
openvasmd --rebuild --progress
greenbone-certdata-sync
greenbone-scapdata-sync
openvasmd --update --verbose --progress

/etc/init.d/openvas-manager restart
/etc/init.d/openvas-scanner restart
Now you're all set. You can easily start and stop OpenVAS whenever you need to use it!